Appearance
How to set up a project
Here is a guide on how you set up a new project.
Create a new project
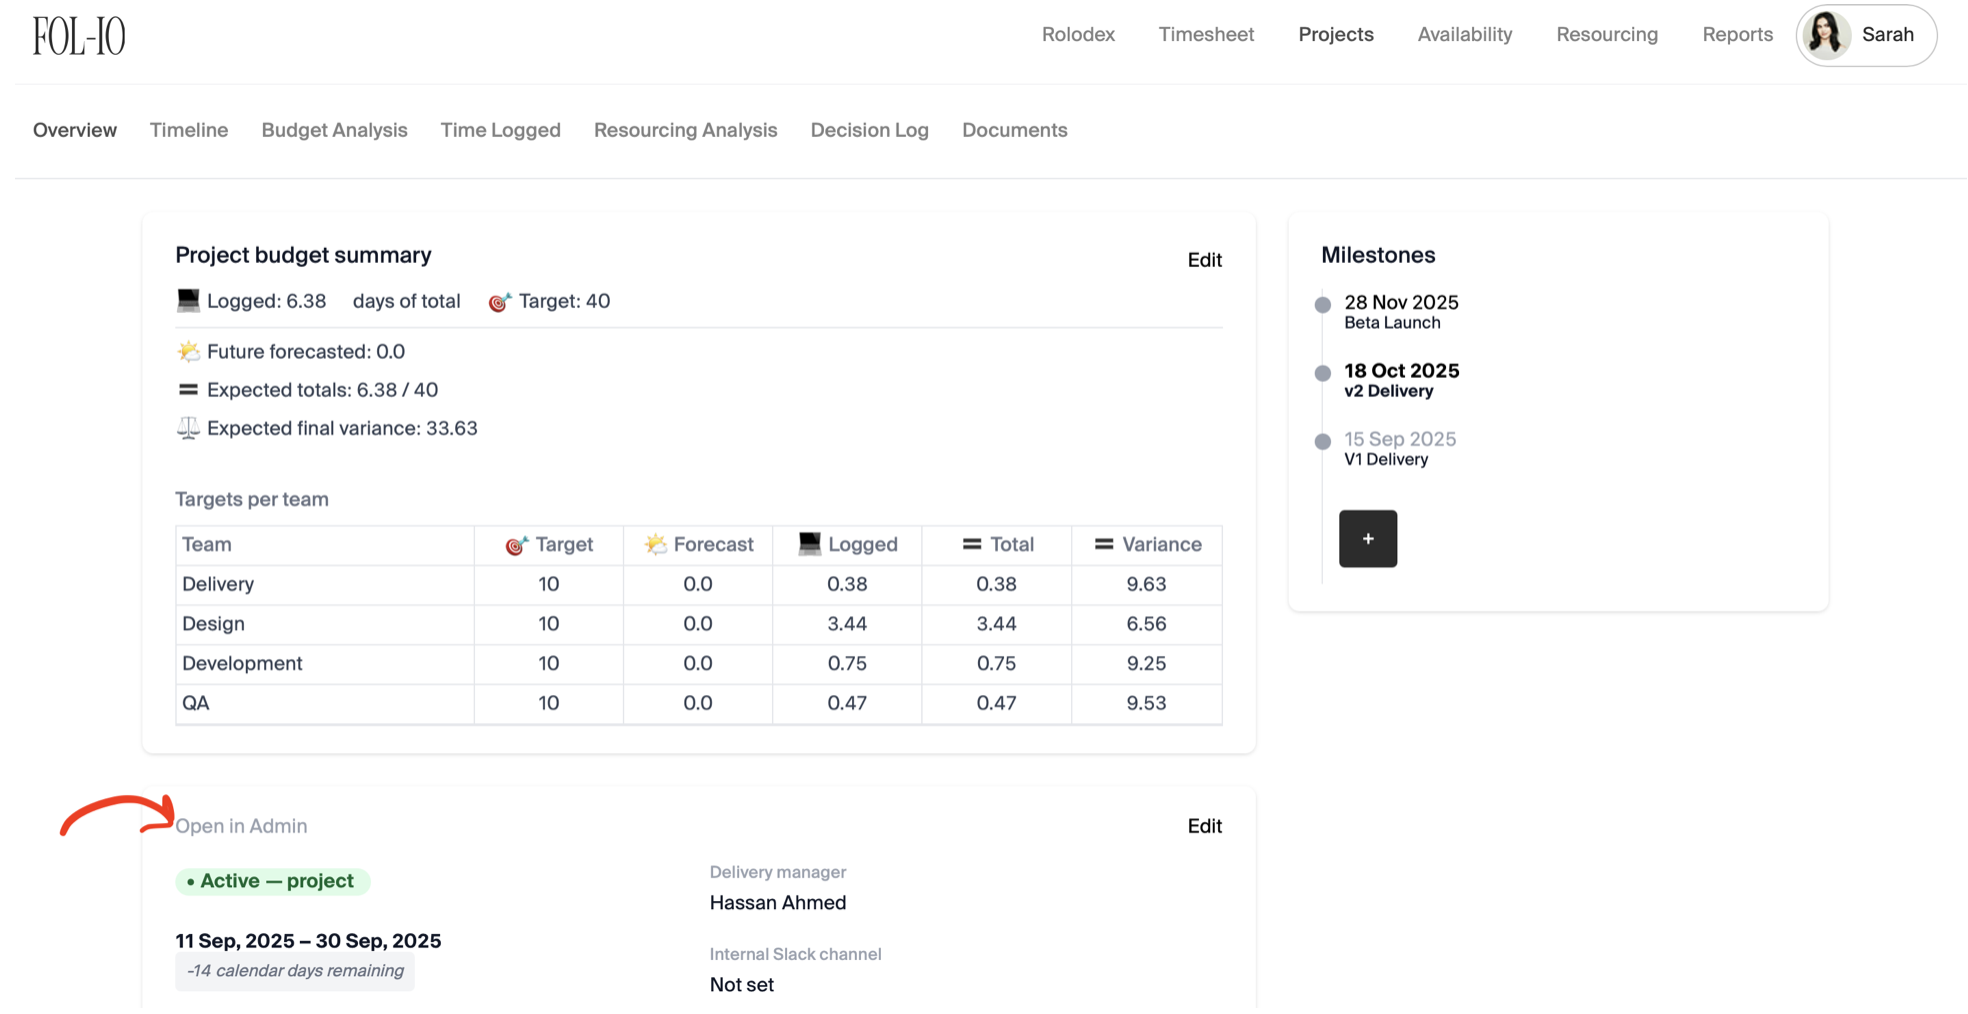
In order to create a new project, a client profile must exist beforehand. If this is the first time logging a project for a client, you'd need to create a profile within the admin area of the portal. You can access this via: your profile icon > Admin or or click on Open in Admin from one of the projects - both methods marked up below -

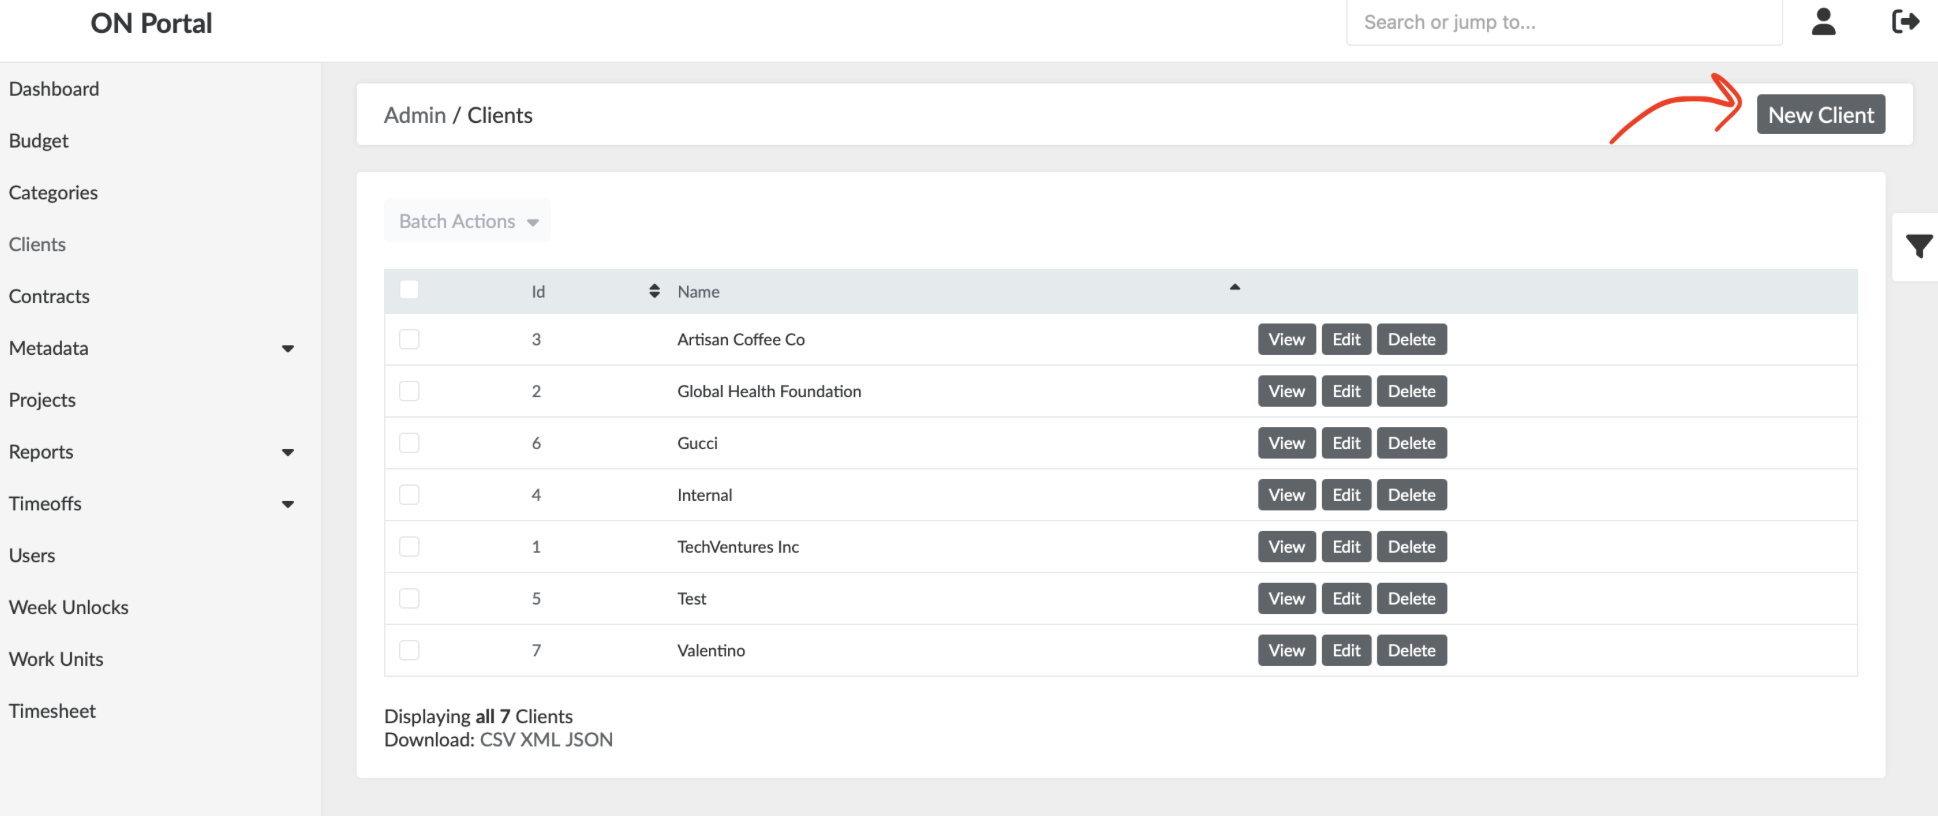
Click on New Client on the top right corner to get started.
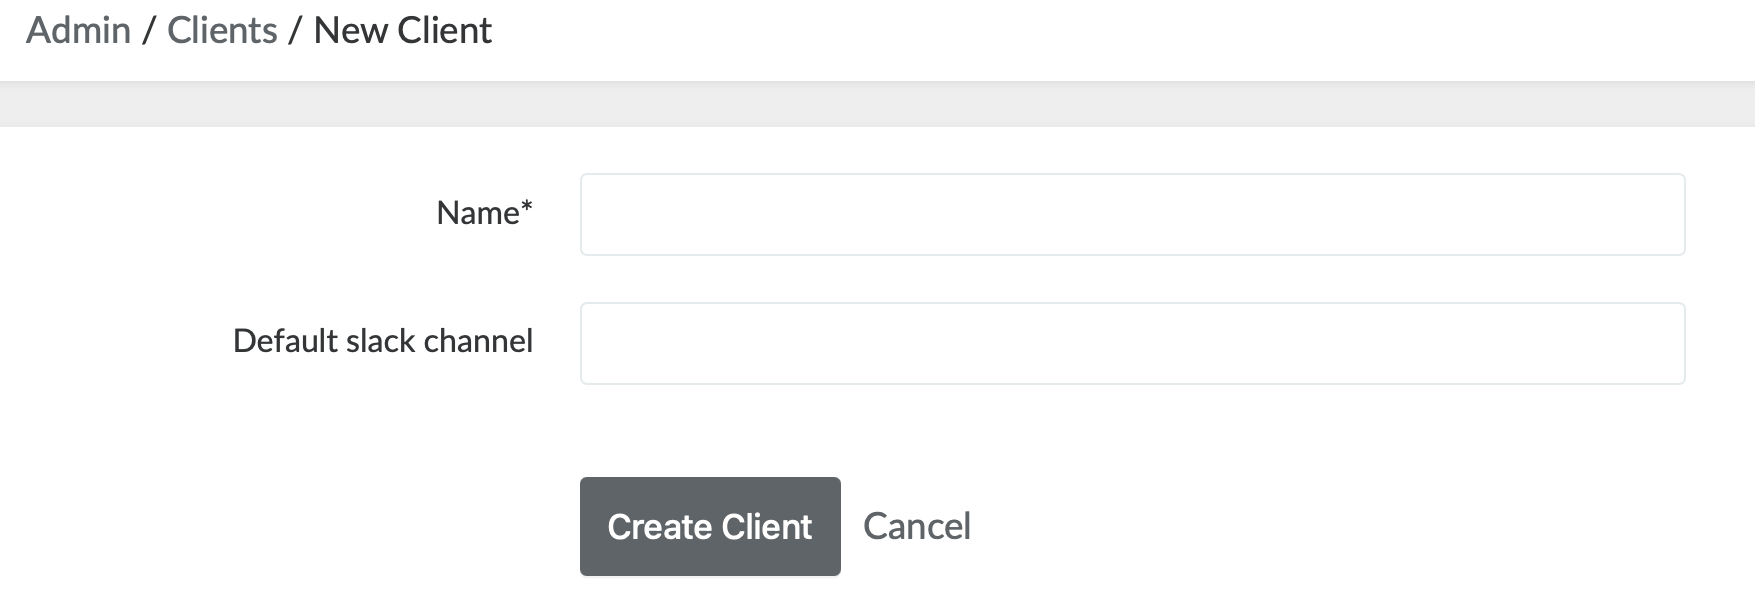
Complete the client name and Slack channel and that's it.
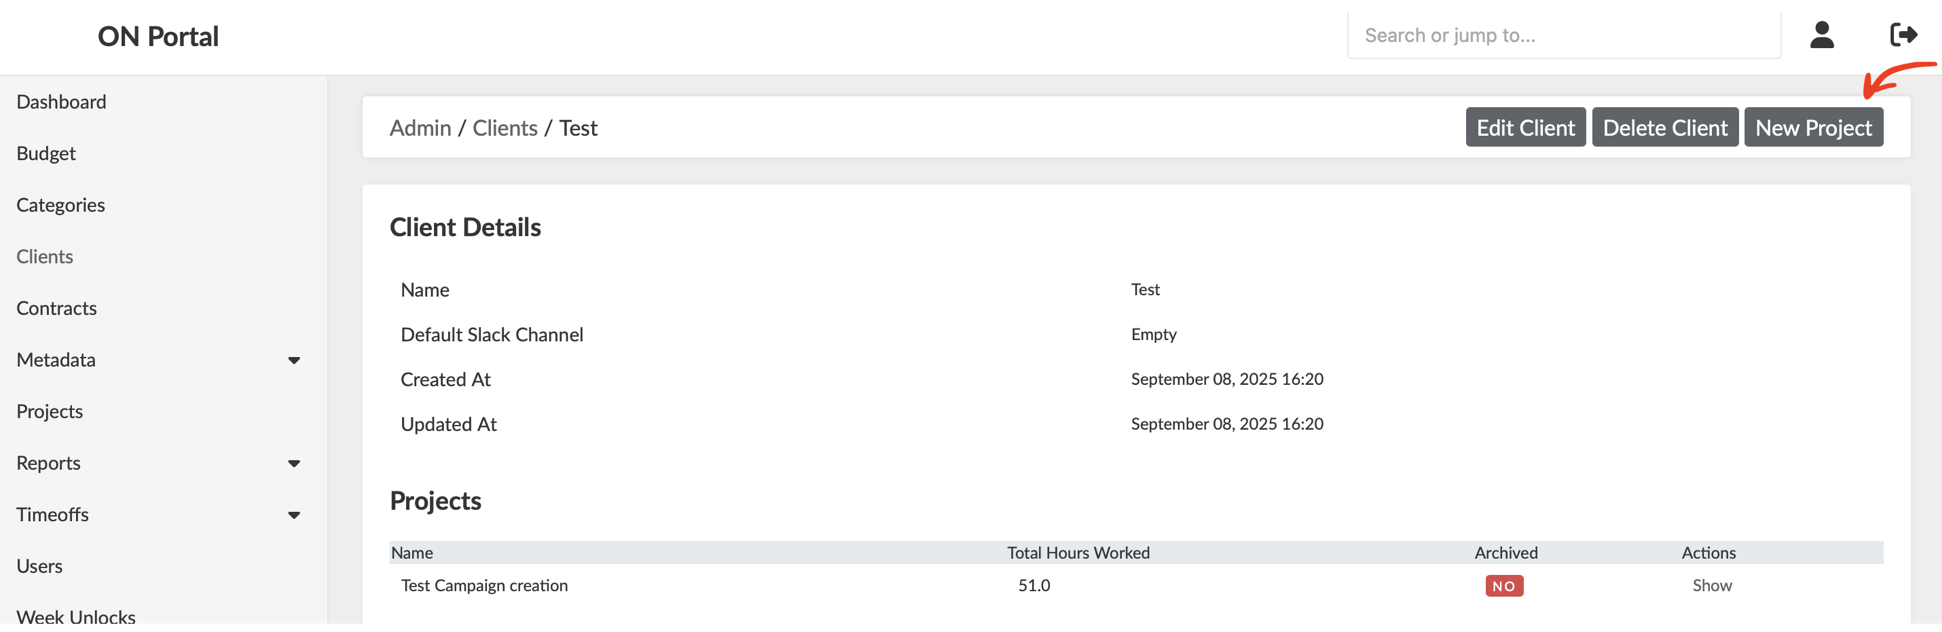
From there, you'll be able to create a New Project for that client and complete all the relevant project information.
If you jump back to the main dashboard and click on the Projects tab, you'll be able to see all projects with an Active status. Note that you will be able to see all Retainer projects by clicking on the toggle.

Creating project workstreams
Most projects are broken down into multiple workstreams, each focused on a specific area of activity, such as design UI/UX or development. These workstreams span the entire lifecycle of a project.
To create a new workstream, click on the project arrow (see 1.), add workstream and set the date range (see 2.), and finally, add team members (see 3.) -
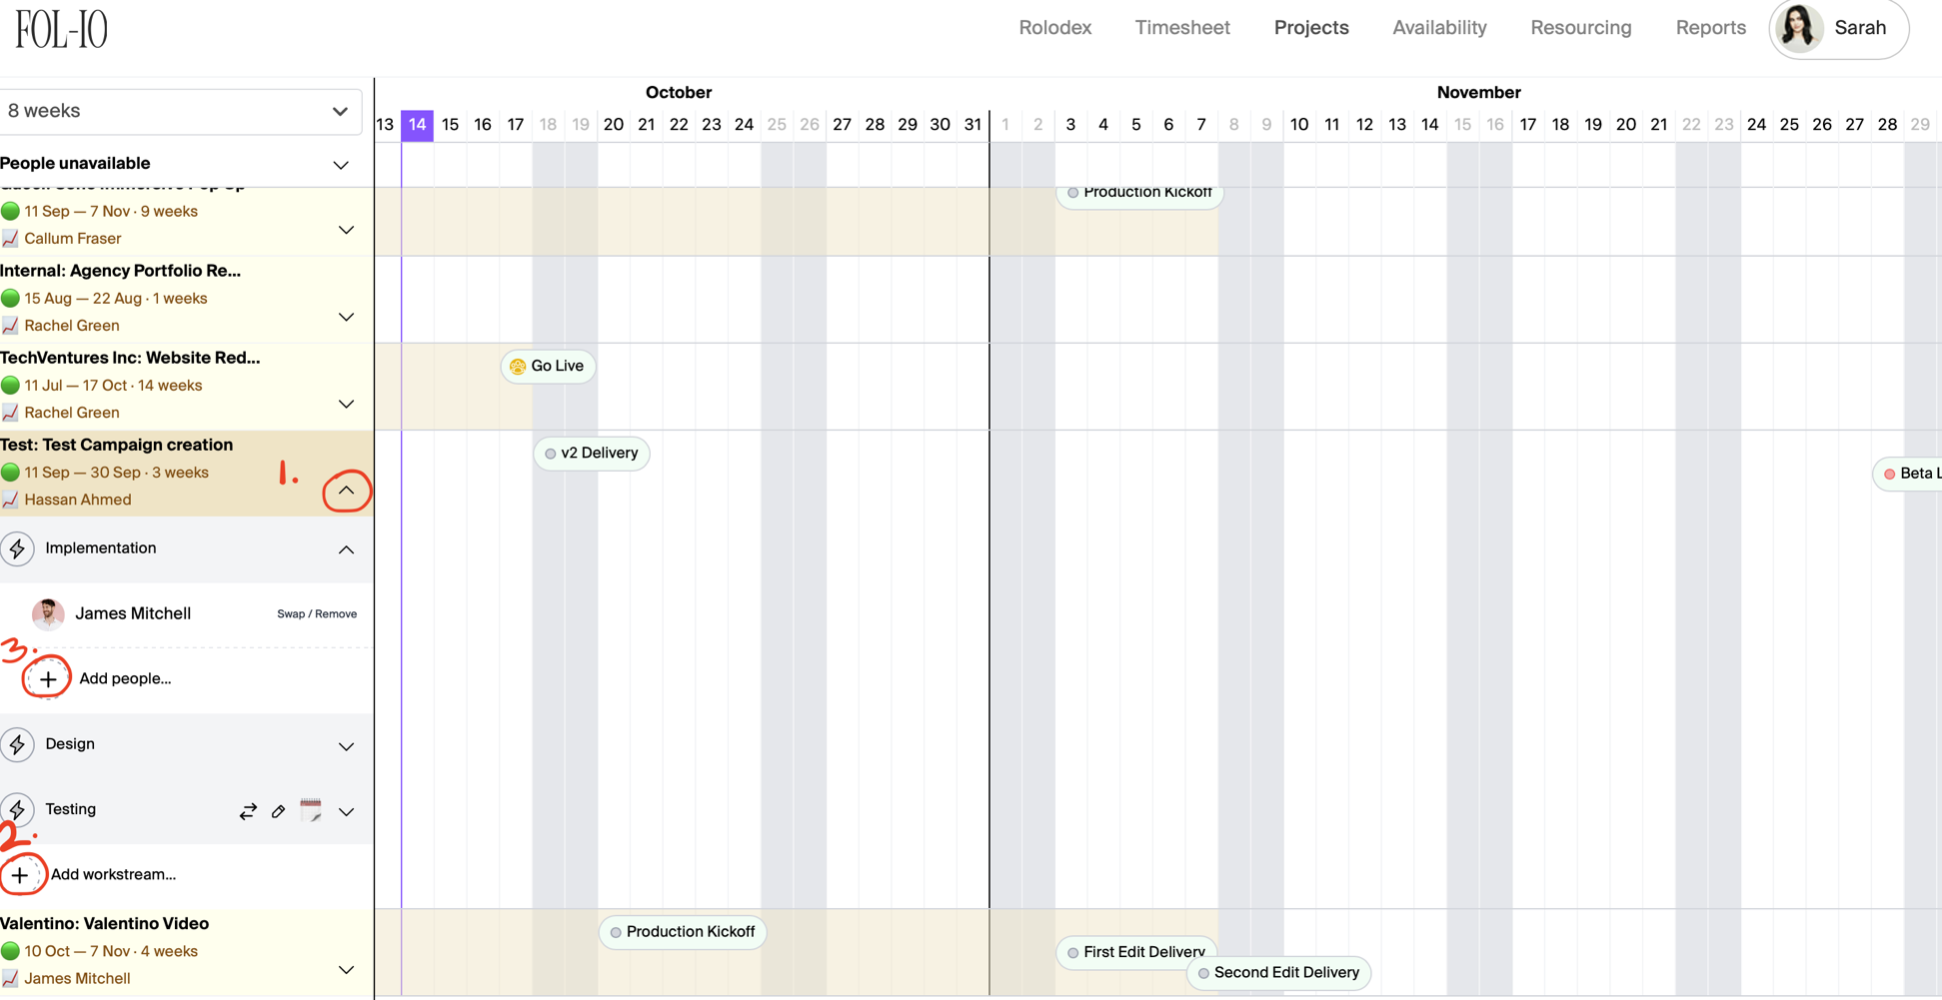
You'll be able to also plot milestones into the timeline directly by clicking on the desired date.
