Appearance
Resource planning and budget tracking
Here is a guide on how you plan resource for a project via two different views (Project and Resourcing) as well as how to track budget throughout.
Resource planning via Project View
Either part of the initial project setup or following shortly after, you will need to plan resource for the duration of the project. These numbers will feed into the future forecasted number as well as the expected final variance number under the Project Budget Summary.
If you click on the desired date, you'll have a useful popup message stating which other projects this team member has been allocated to. This provides visibility into that person's responsibilities and will minimise cases of overallocation and clashes across projects.
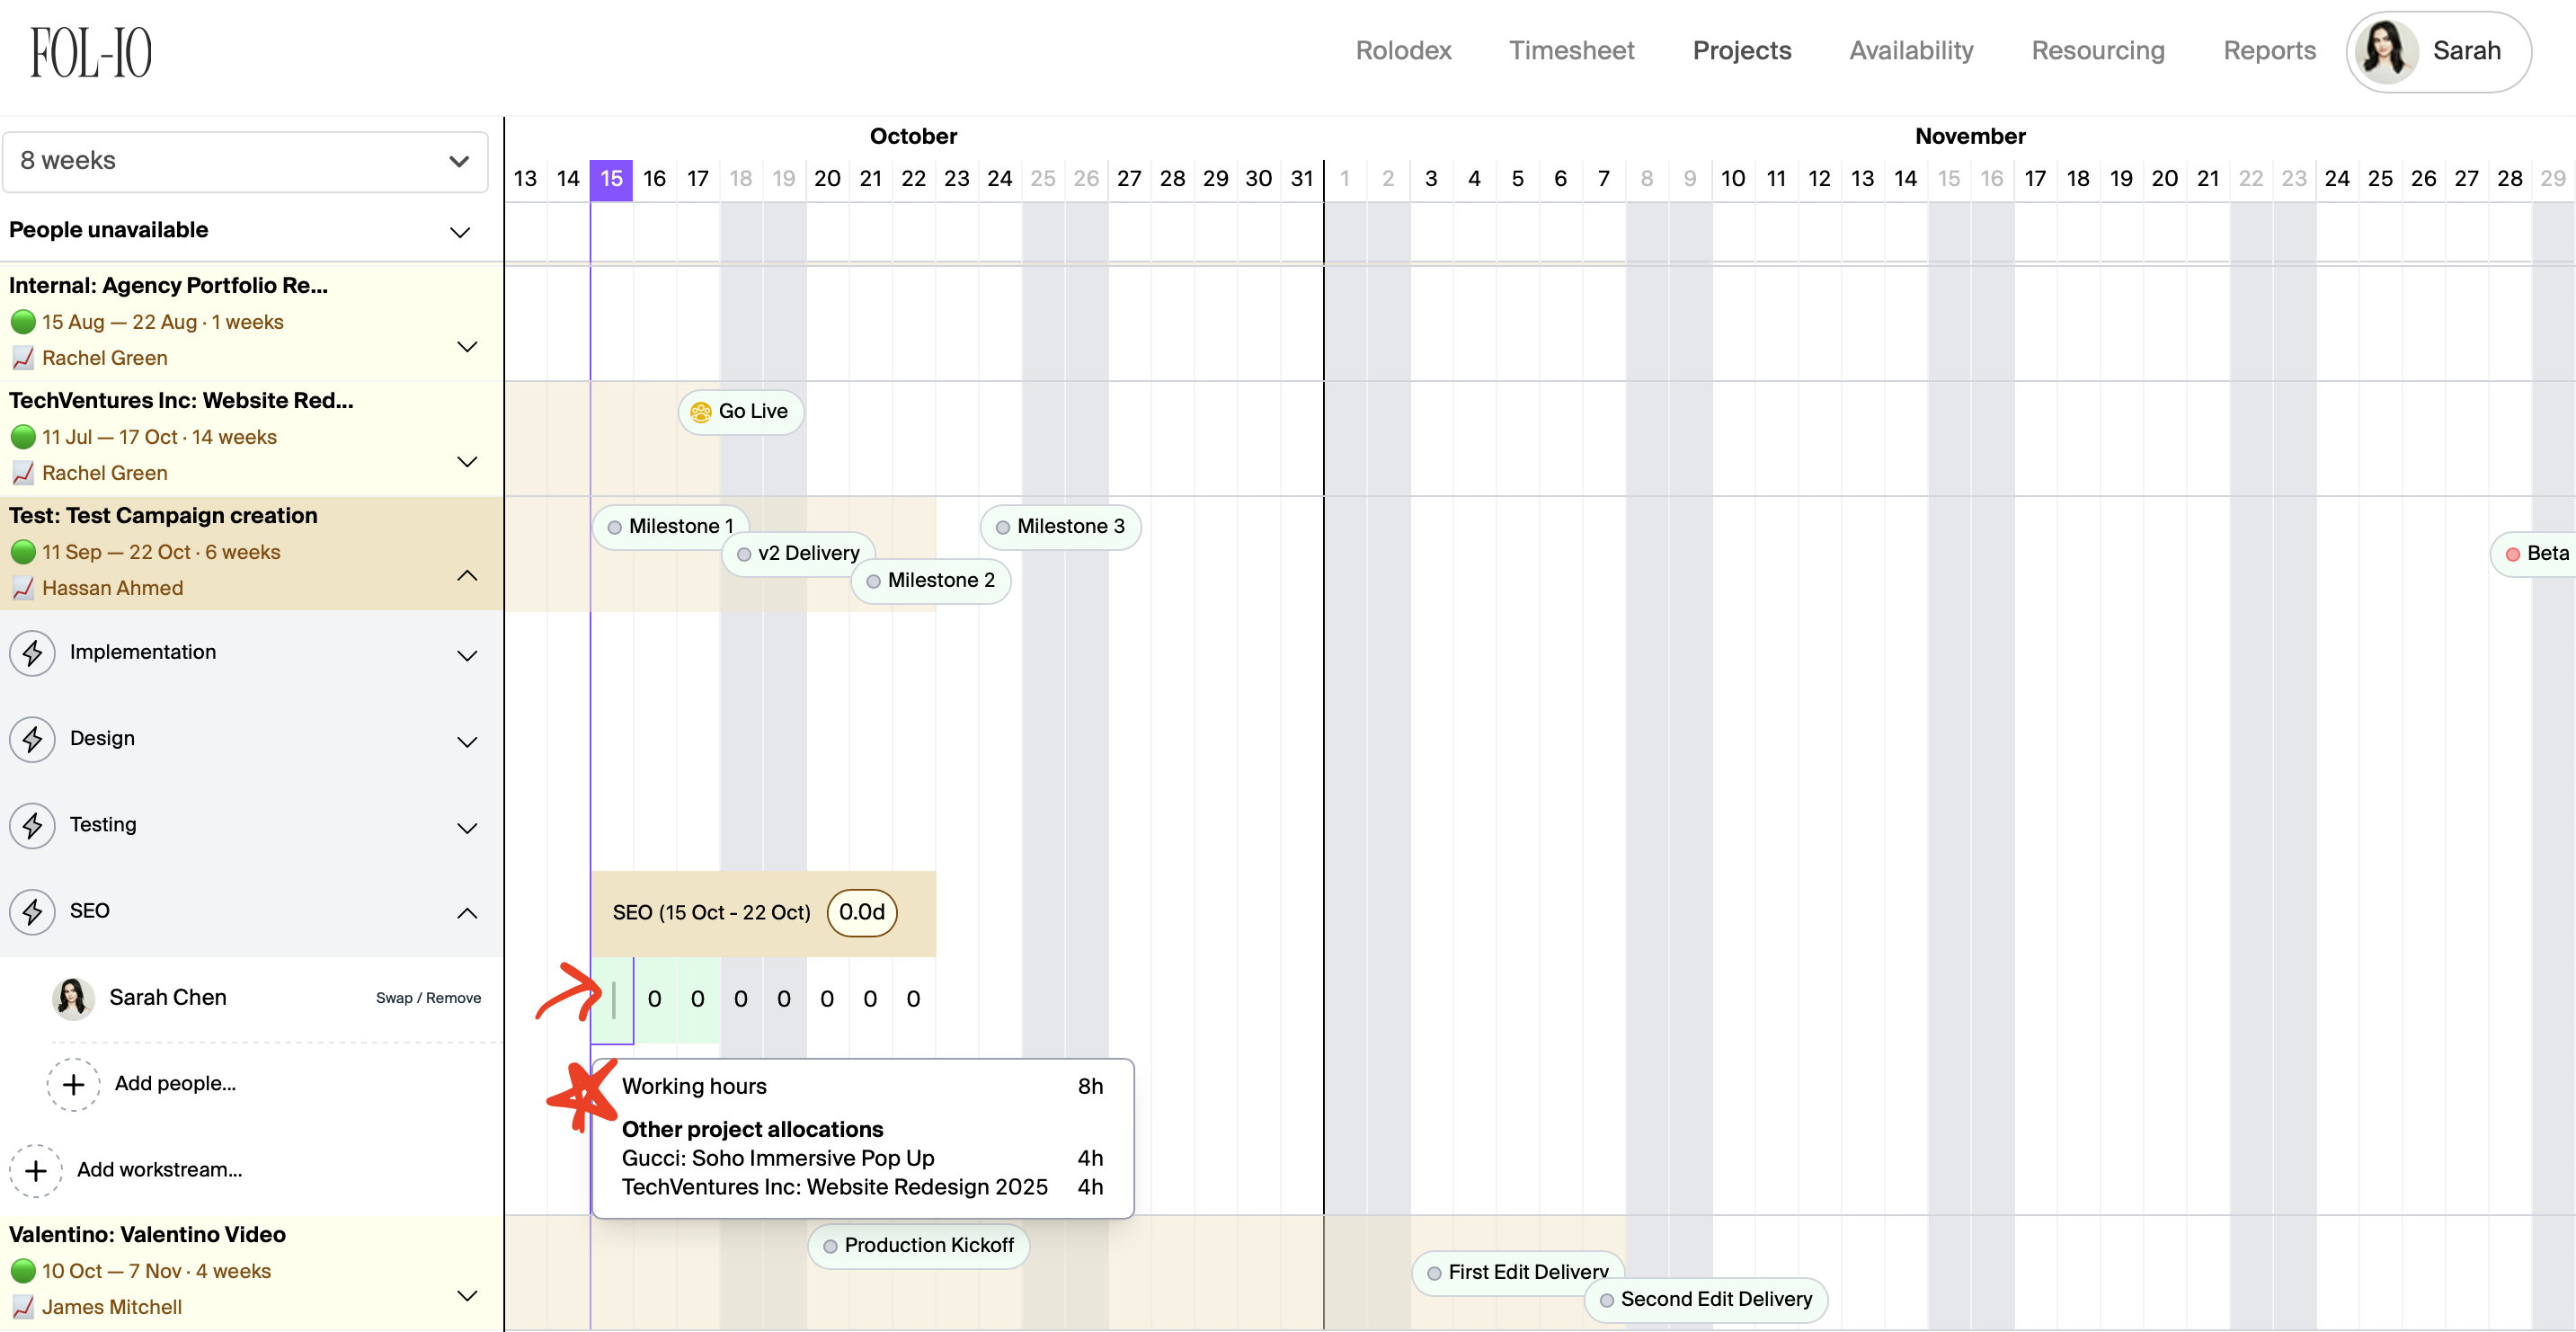
Once you have added your allocations, you will see this being totalled up in the small counter next to the date range, as marked up below. You'll also notice that any overallocation will turn the cell red and any healthy allocation will turn the cell green.

Resource planning via Resourcing View
This view is usually used to make adhoc or minor resourcing changes. Therefore, normally the resource would be fully planned out at the outset using the Project View detailed earlier.
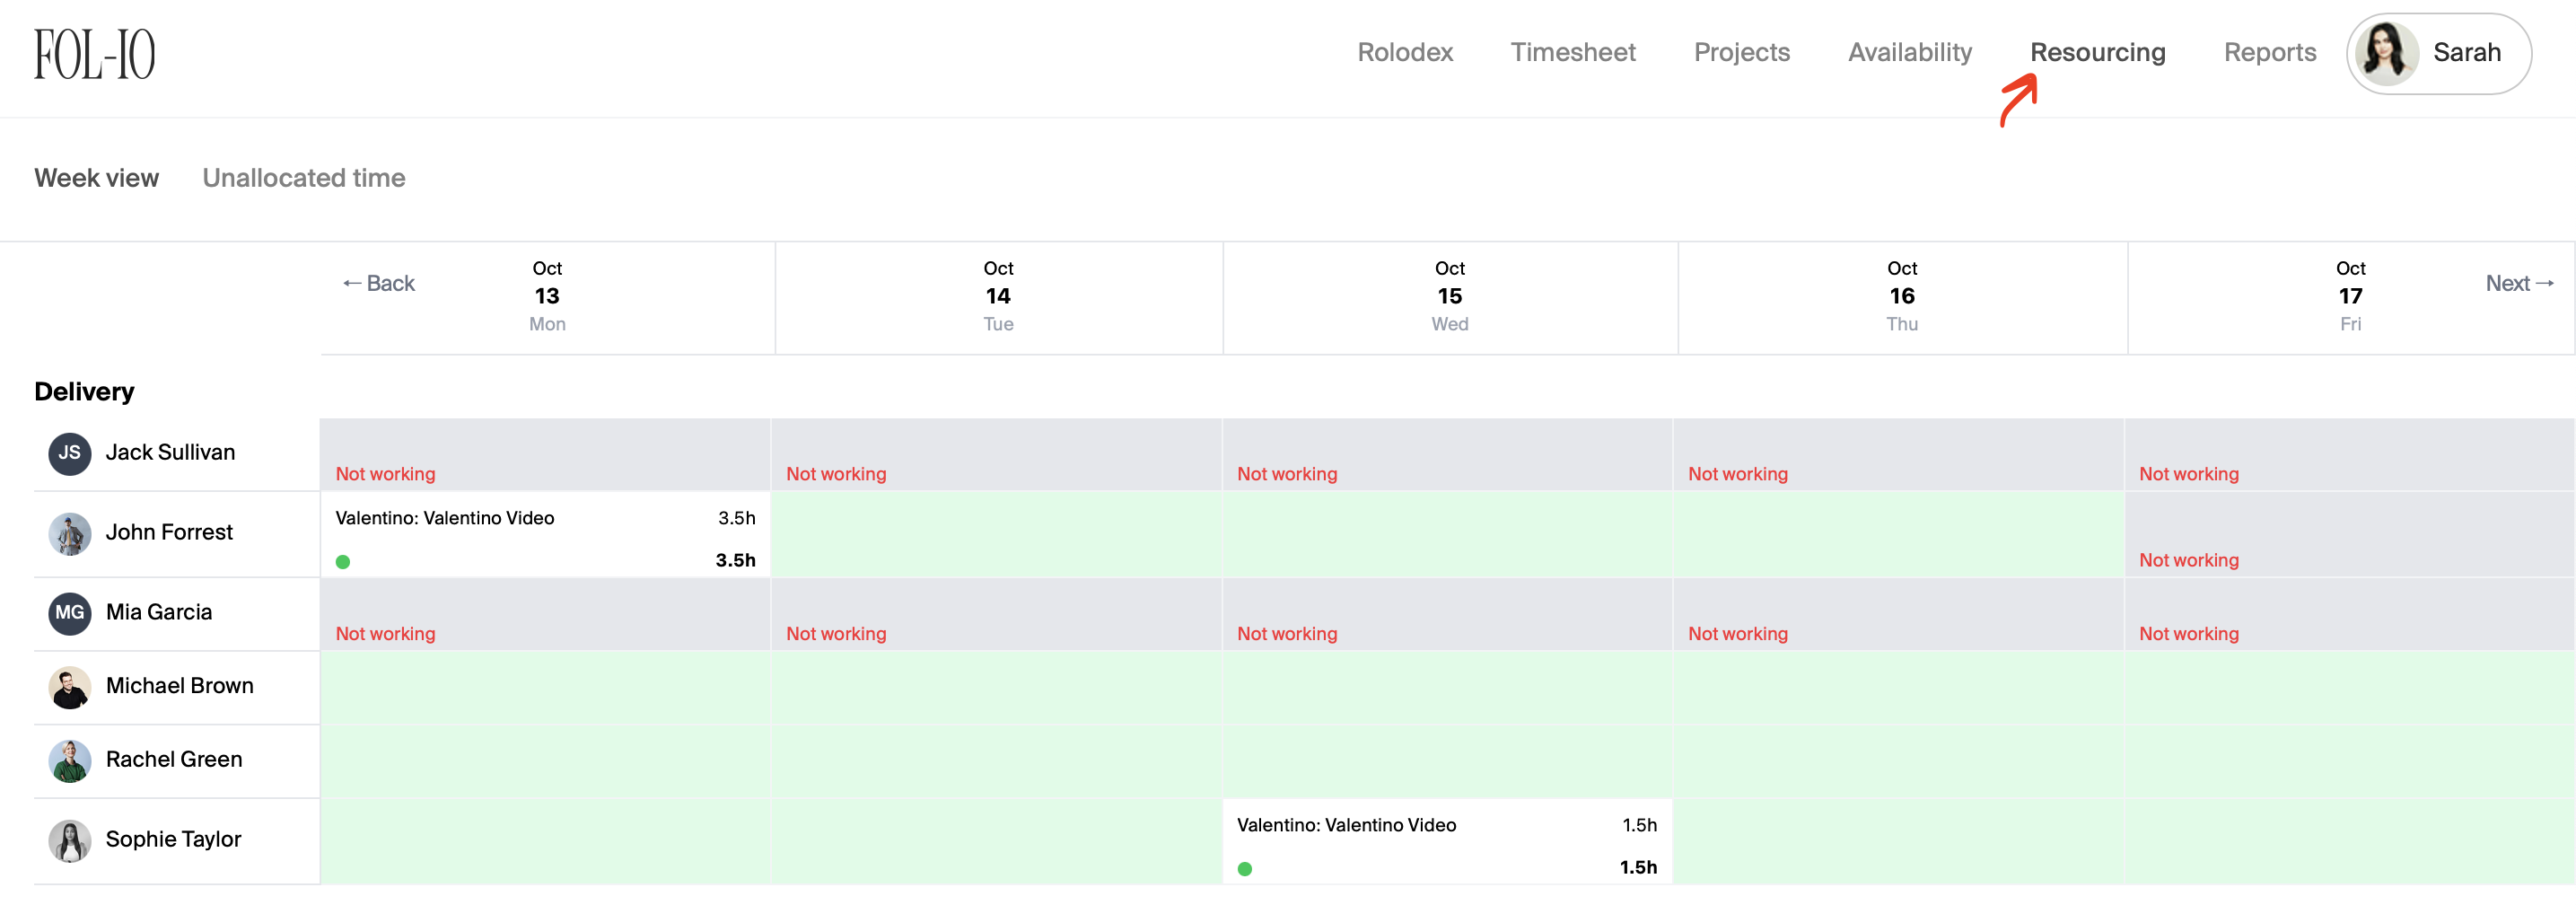
You access this Resourcing View from the top menu of the main dashboard. You will then be able to see allocations for one week at a time. If you'd like to make allocations for the following week, simply click Next on the right hand side of the dates.
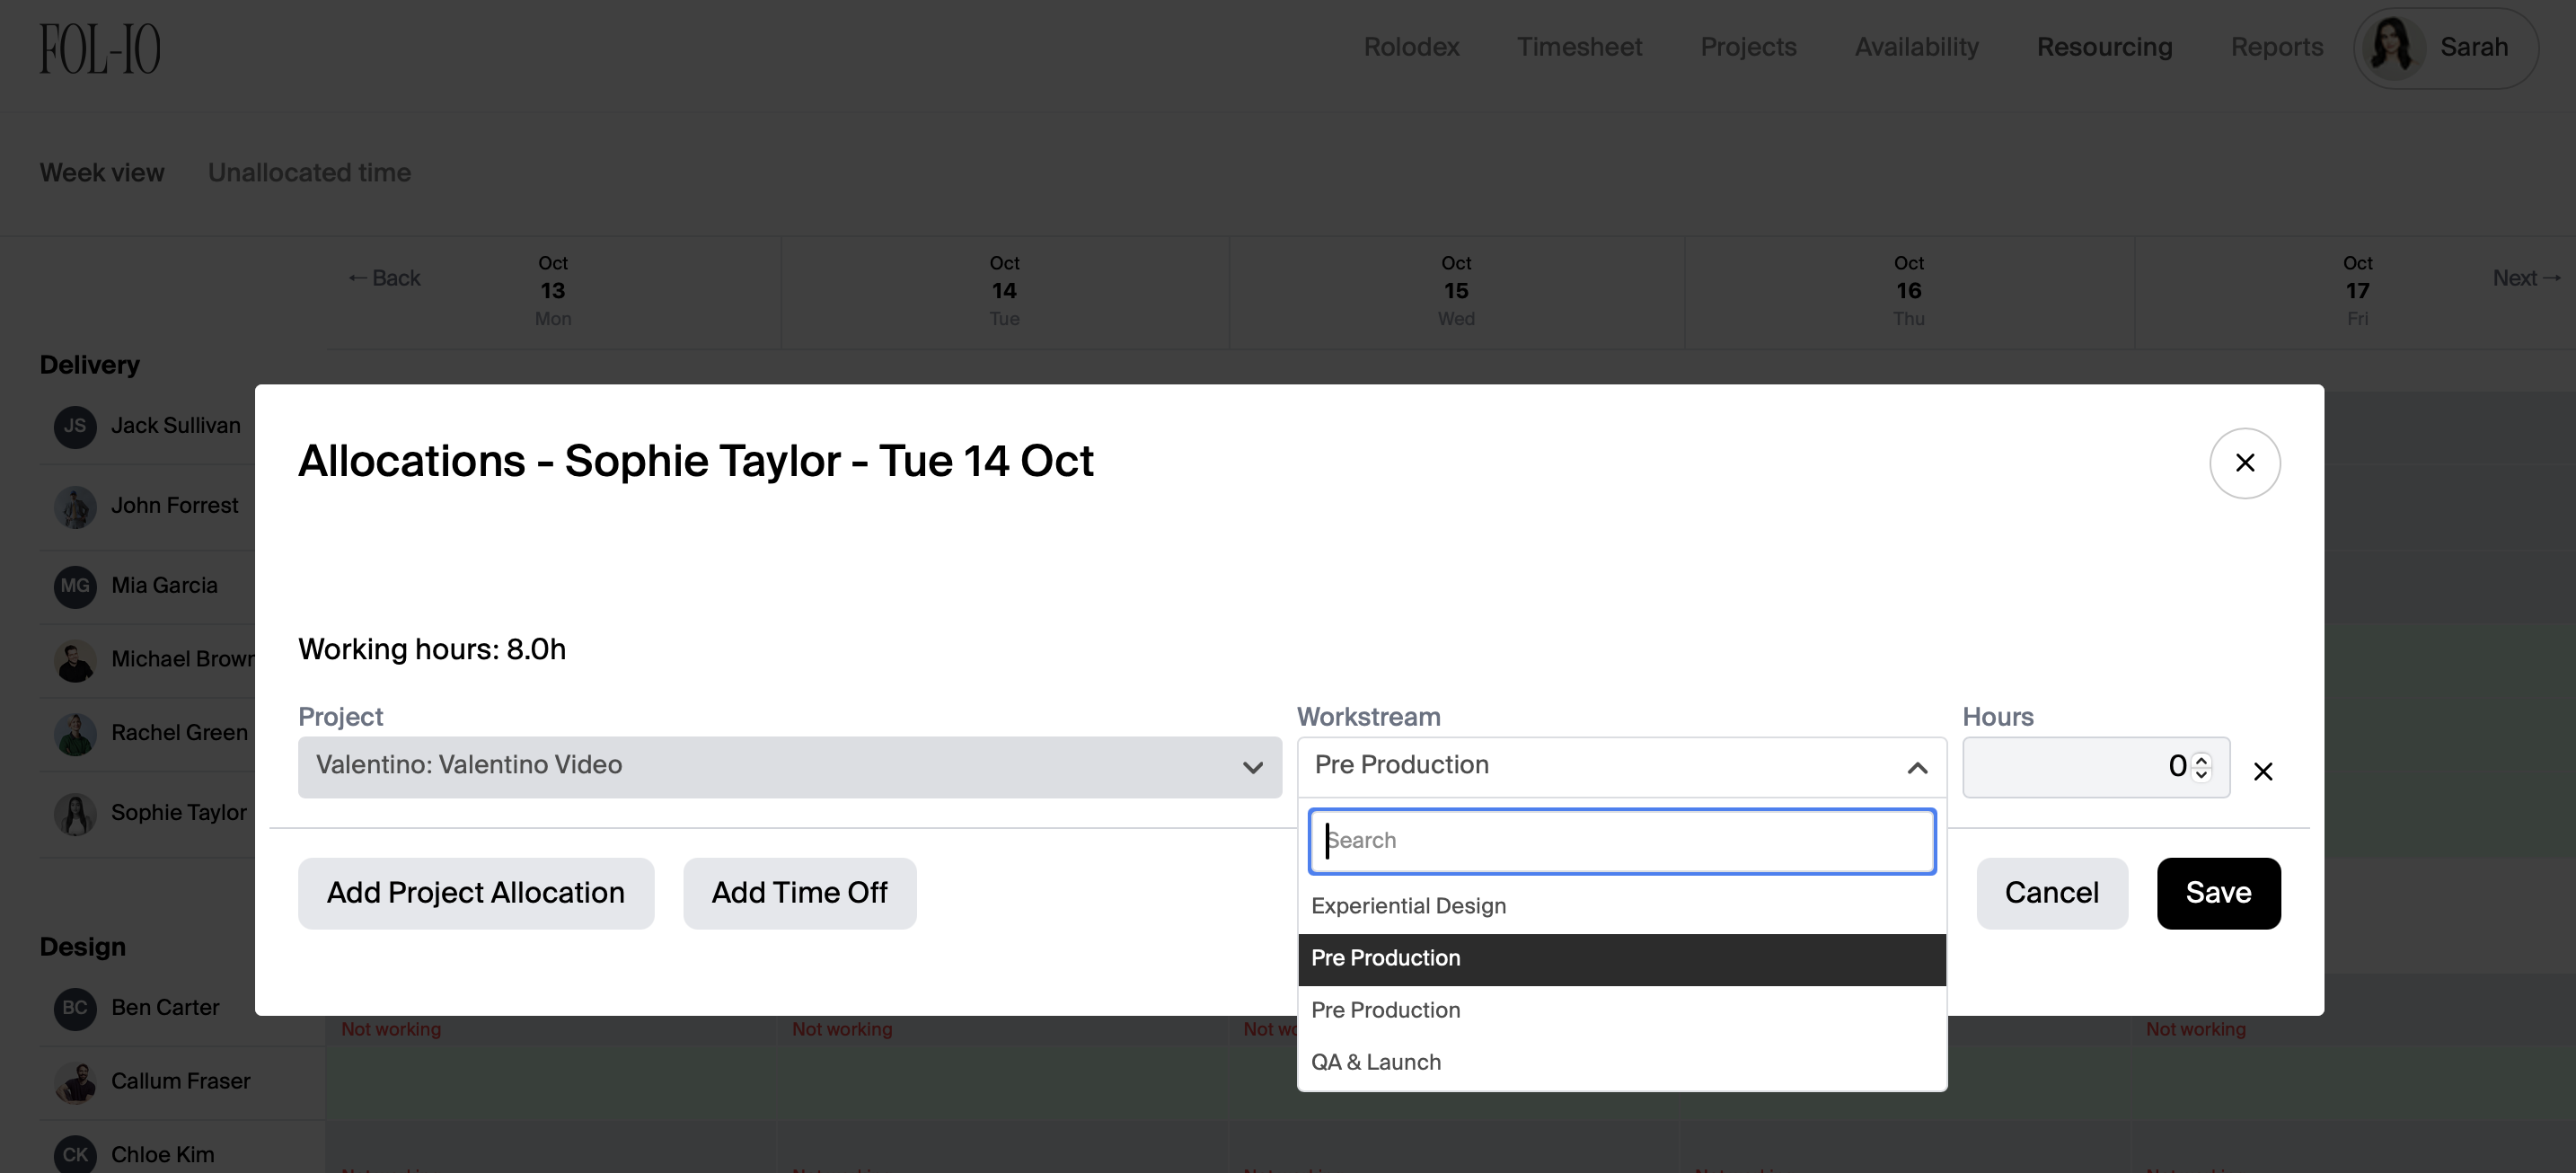
To make an allocation, simply click on the desired day and assign the appropriate number of hours to the person against the correct workstream.
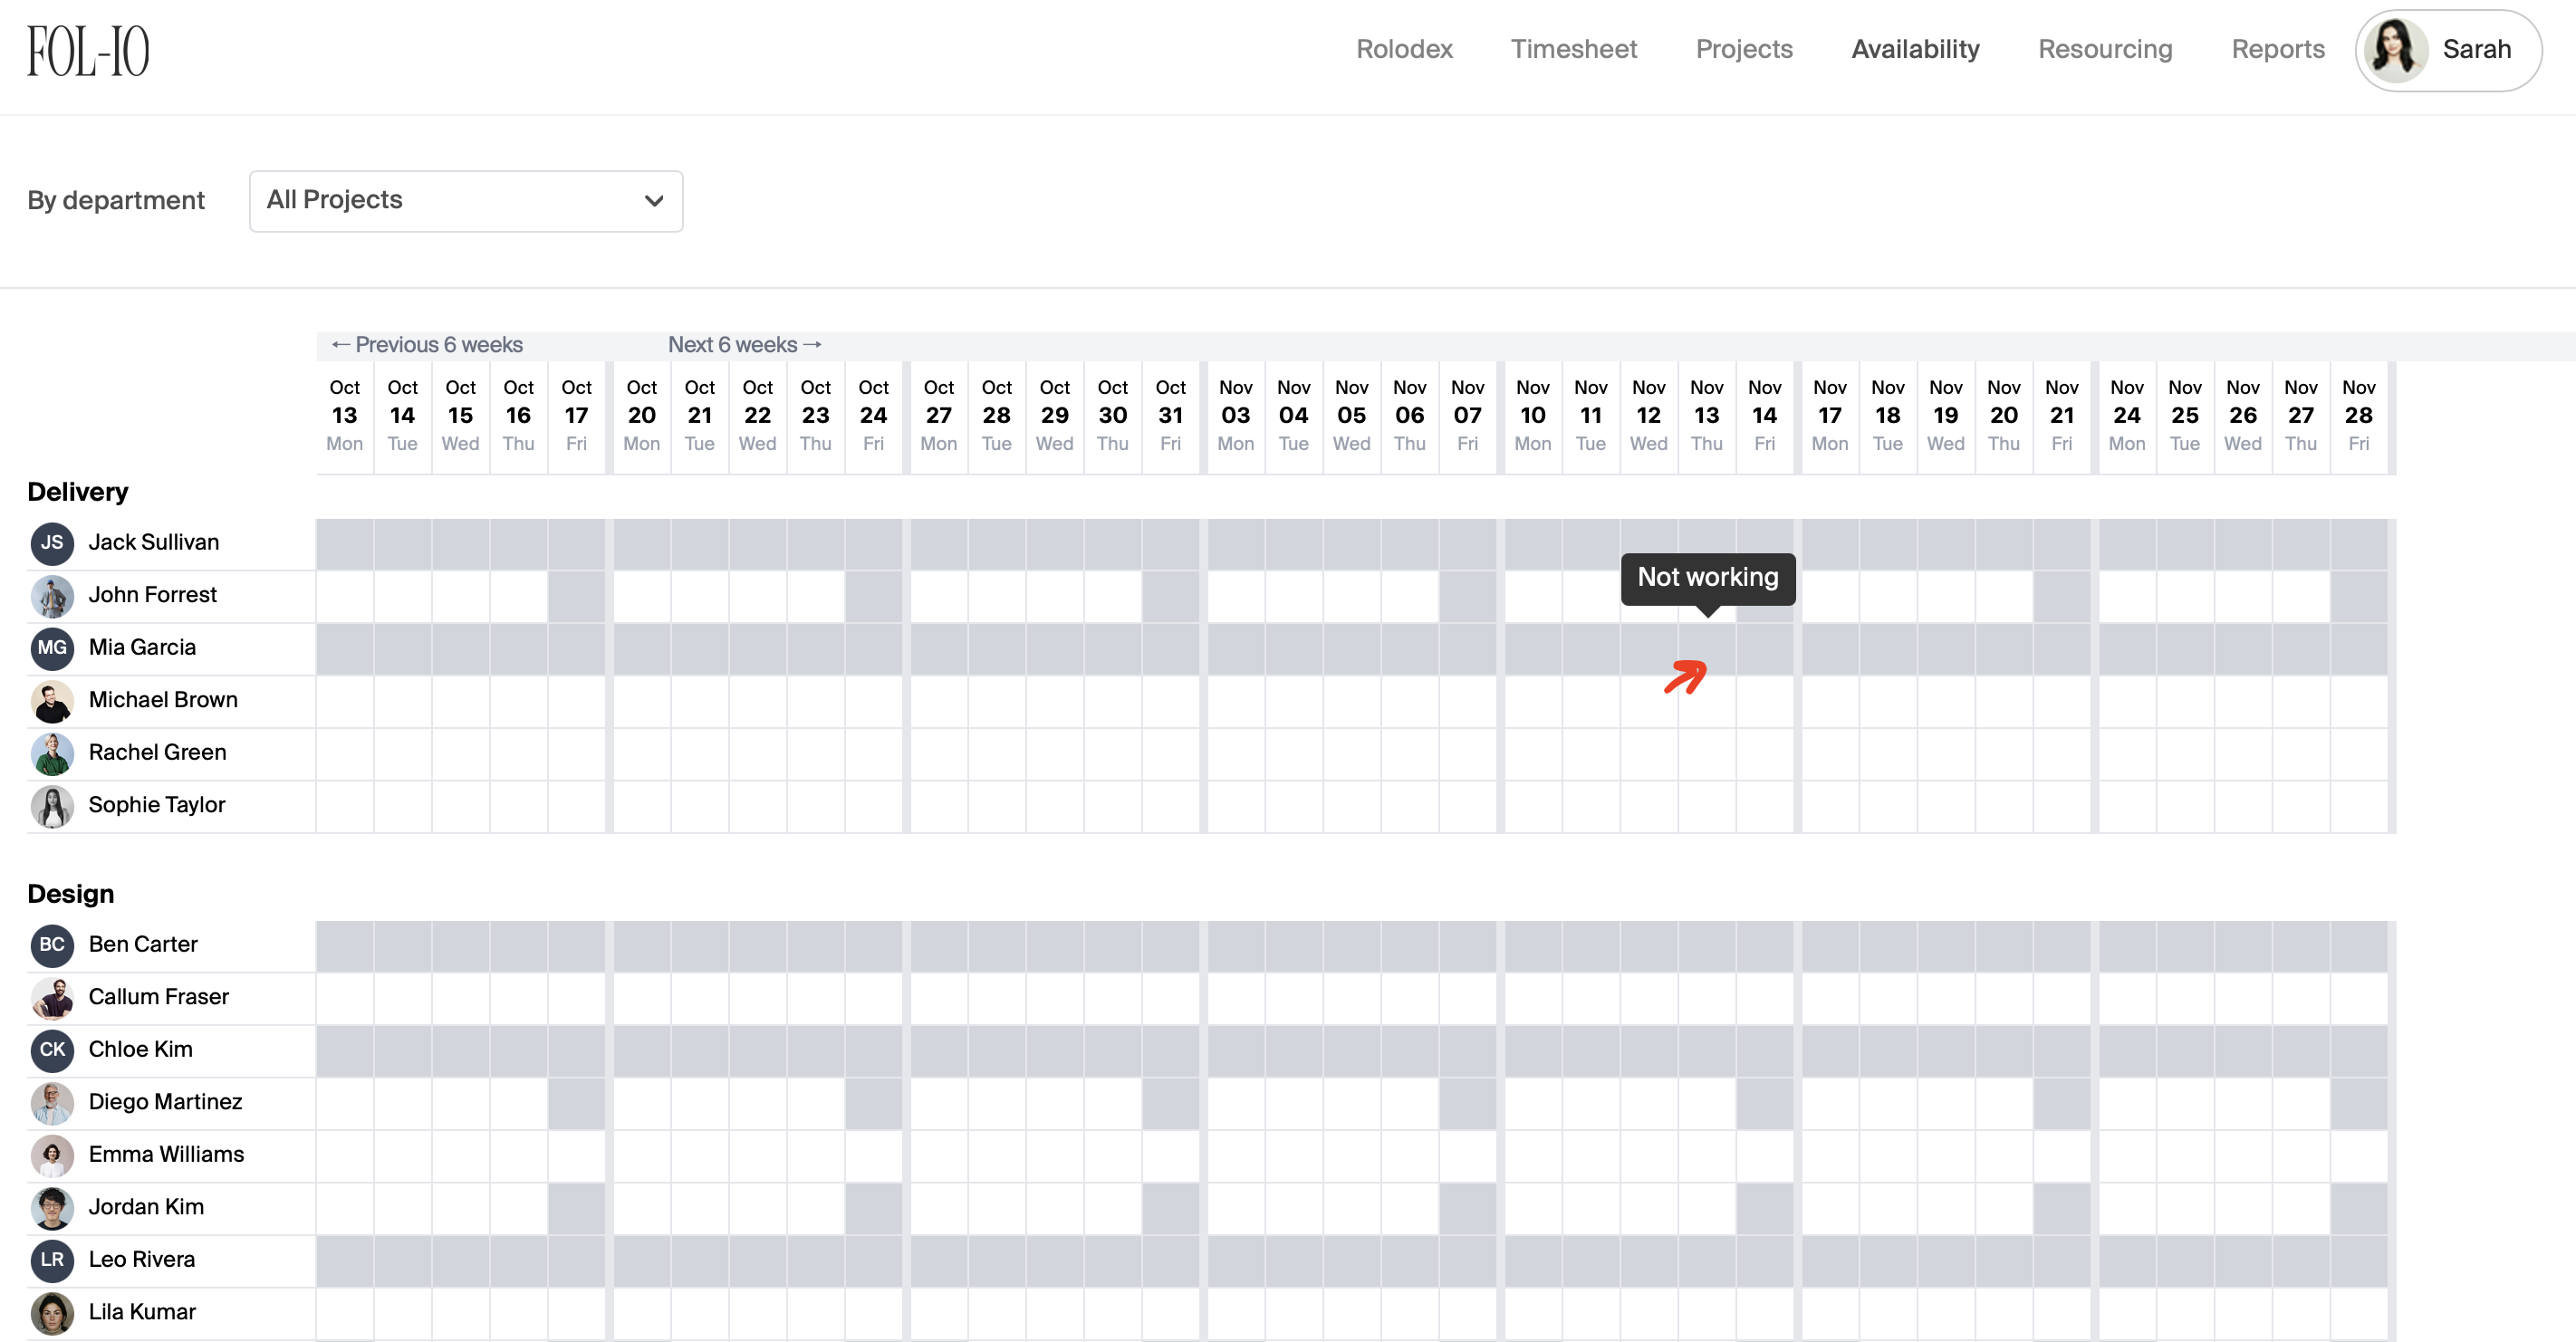
Team availability
For an at-a-glance view of availability across the team, go to the Availability tab from the main dashboard and you will unavailability shaded in. If you hover above a cell, you will see the reason for unavailability, e.g. non-working day or holiday.
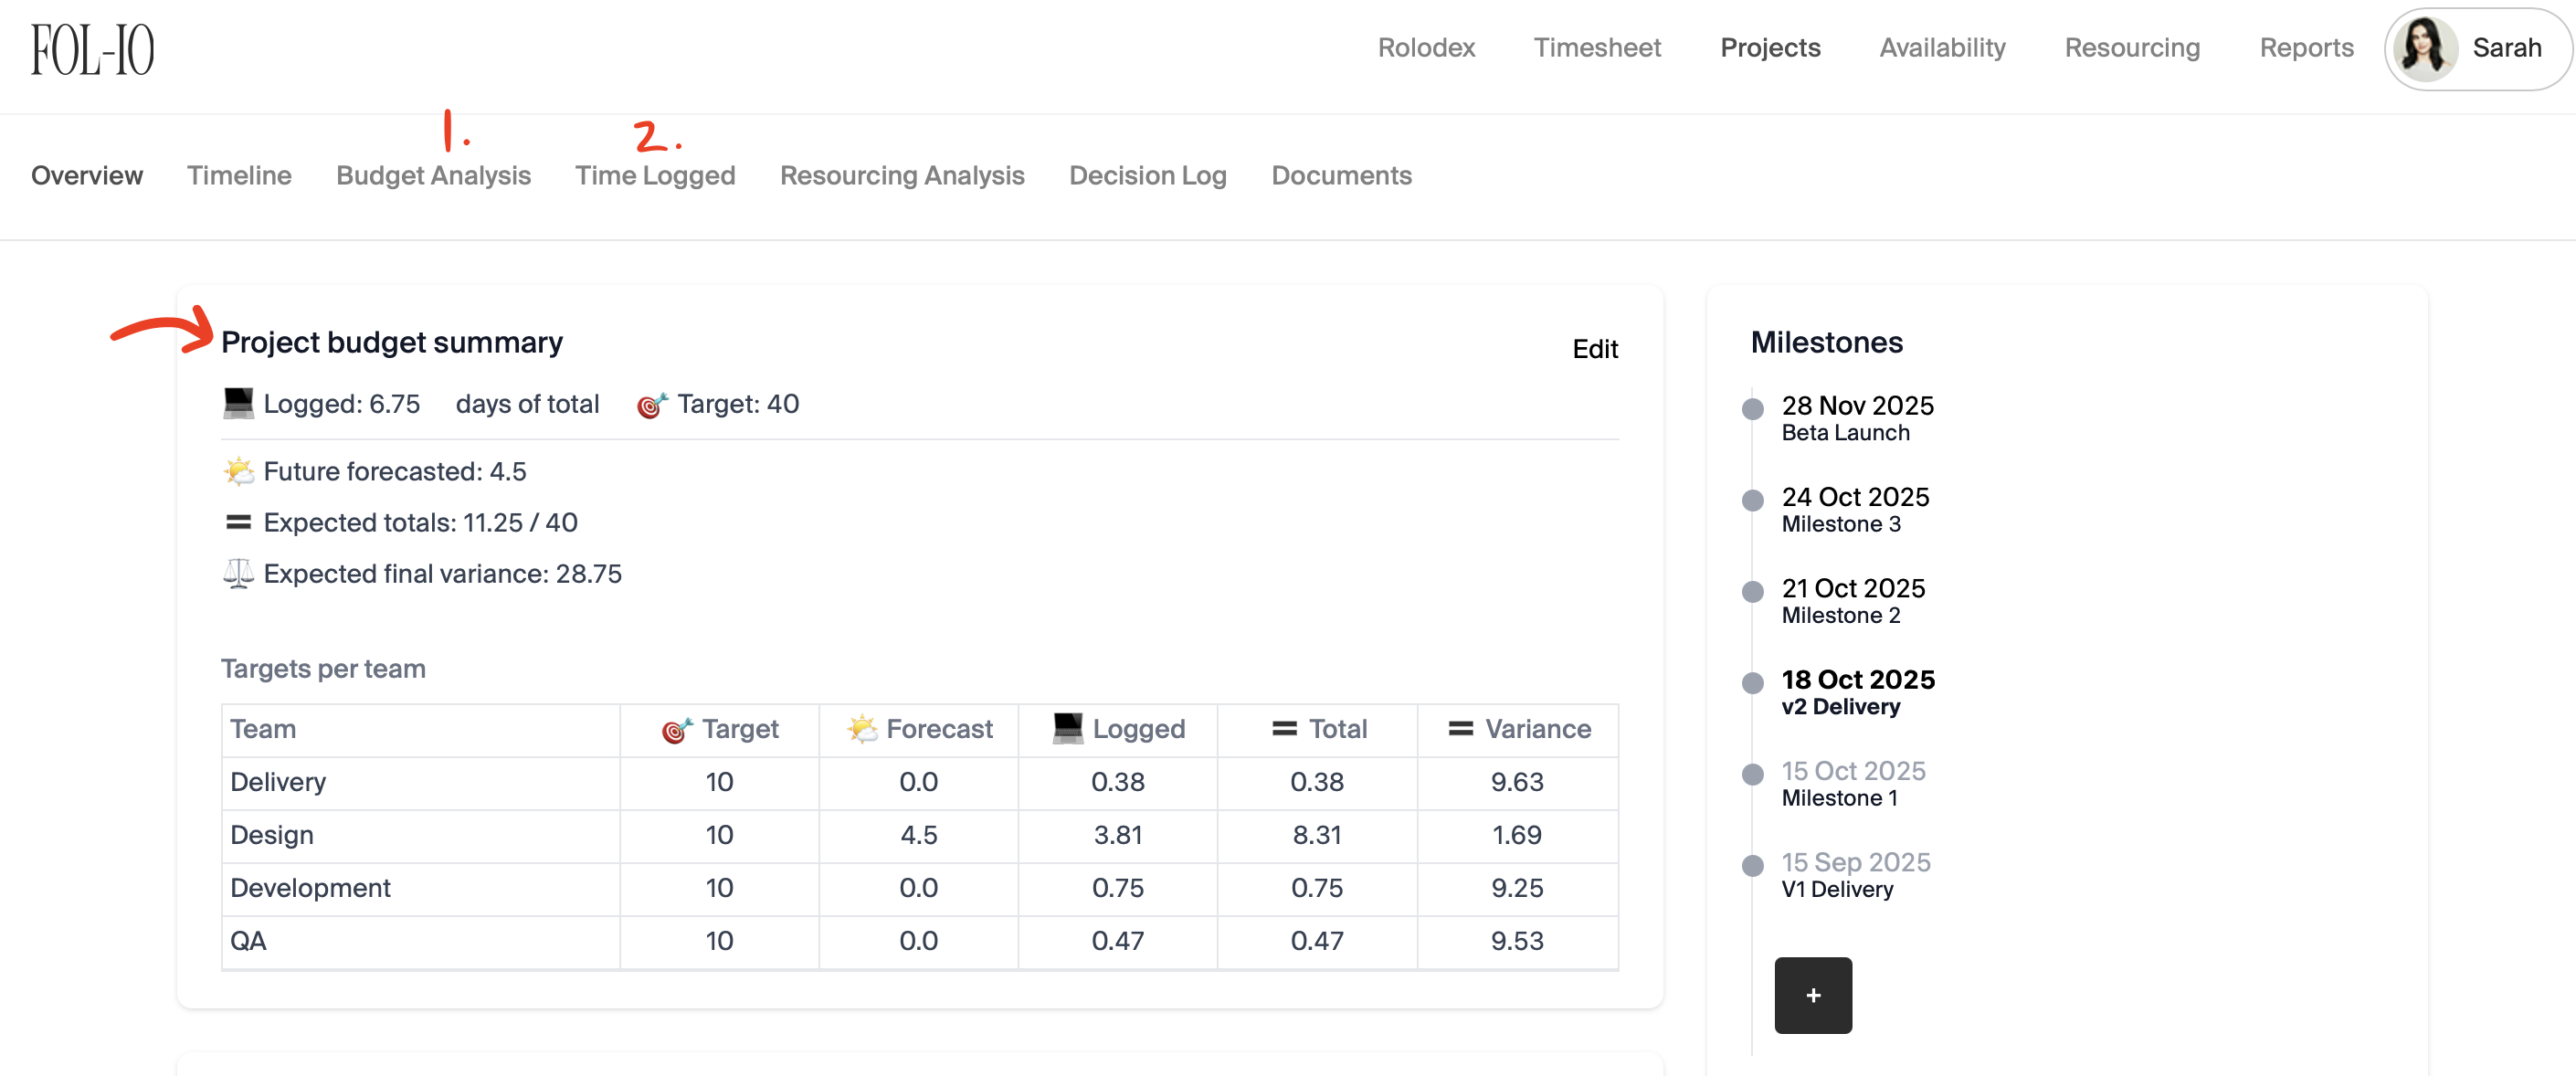
Budget tracking
Throughout the duration of the project, you will want to review budget spend to understand how each phase is tracking. When you click into a project, you will see a summary on the Overview screen. For more granular details, you can click into the Budget Analysis (see 1.) and the Time Logged (see 2.) tabs as per marked below -
Budget analysis
Within the Budget Analysis section, you will be able to see at a glance, the time spent per team/department.
Additionally, you'll be able to track time spent by user (by week/day) and by category (by week/day). You will have the functionality to export a CSV file of any data required.
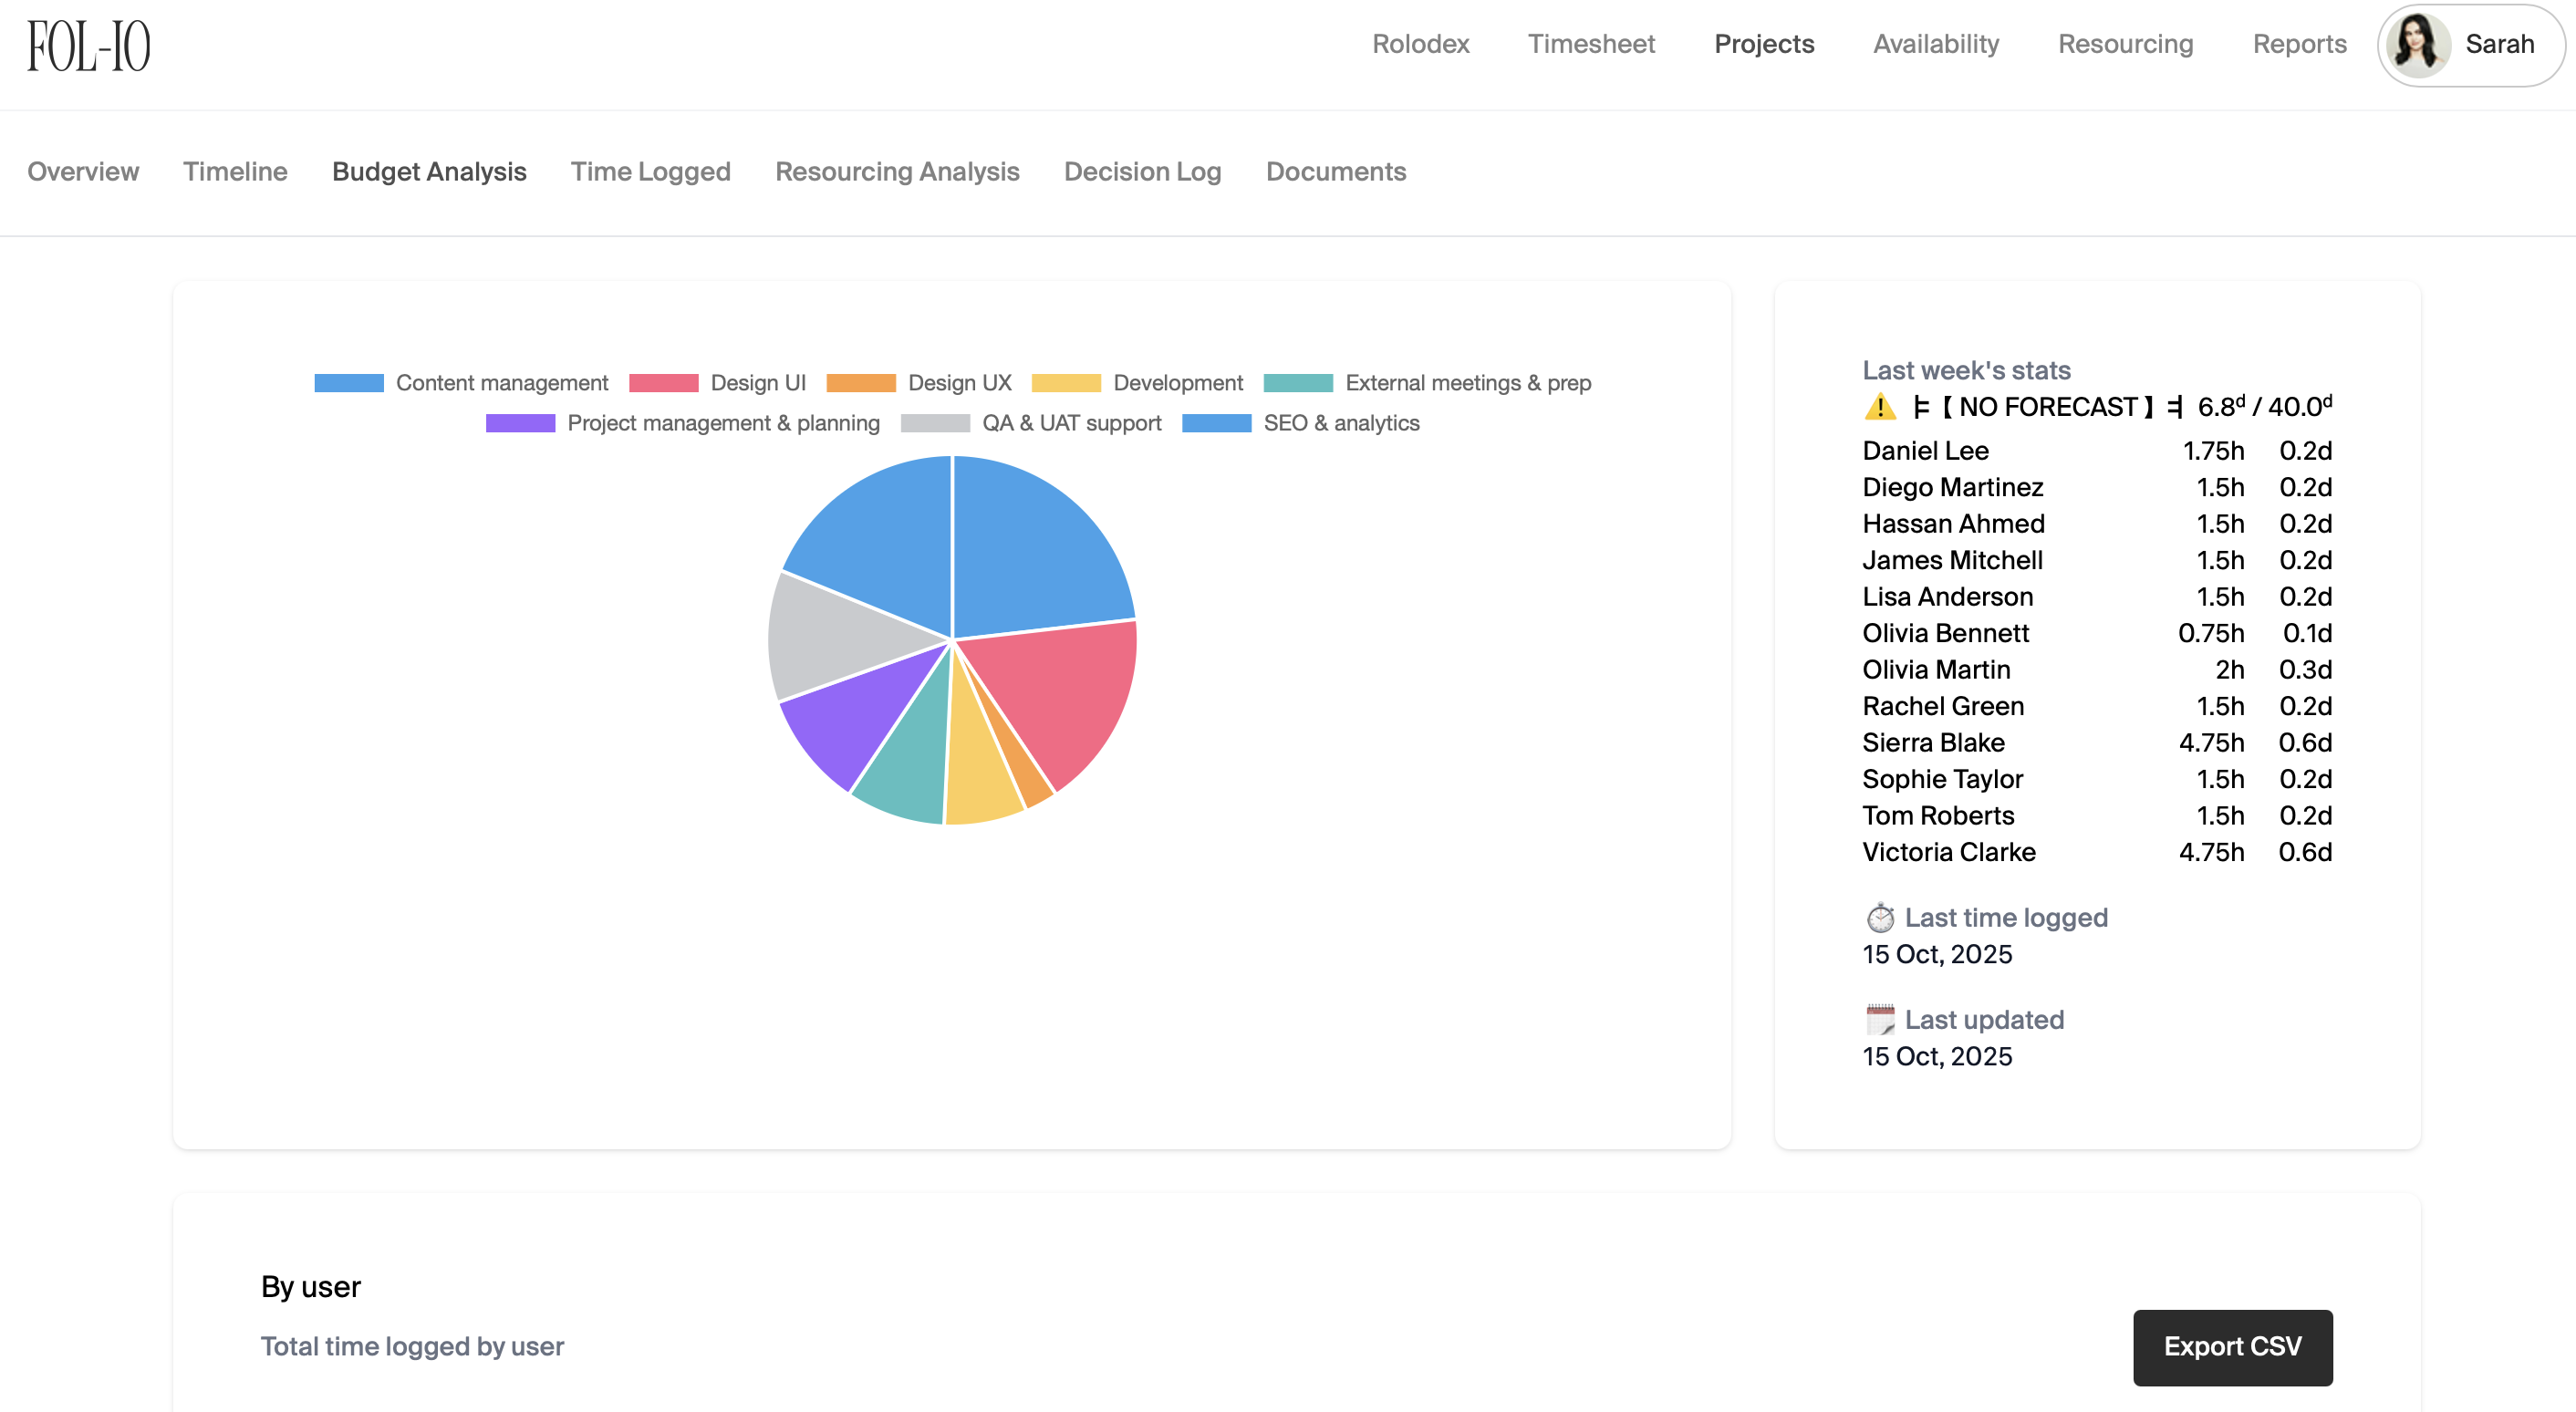
N.B. Categories can be design, development, SEO or meetings for instance. New categories can be added and existing categories edited within the Admin dashboard, within the Categories section.

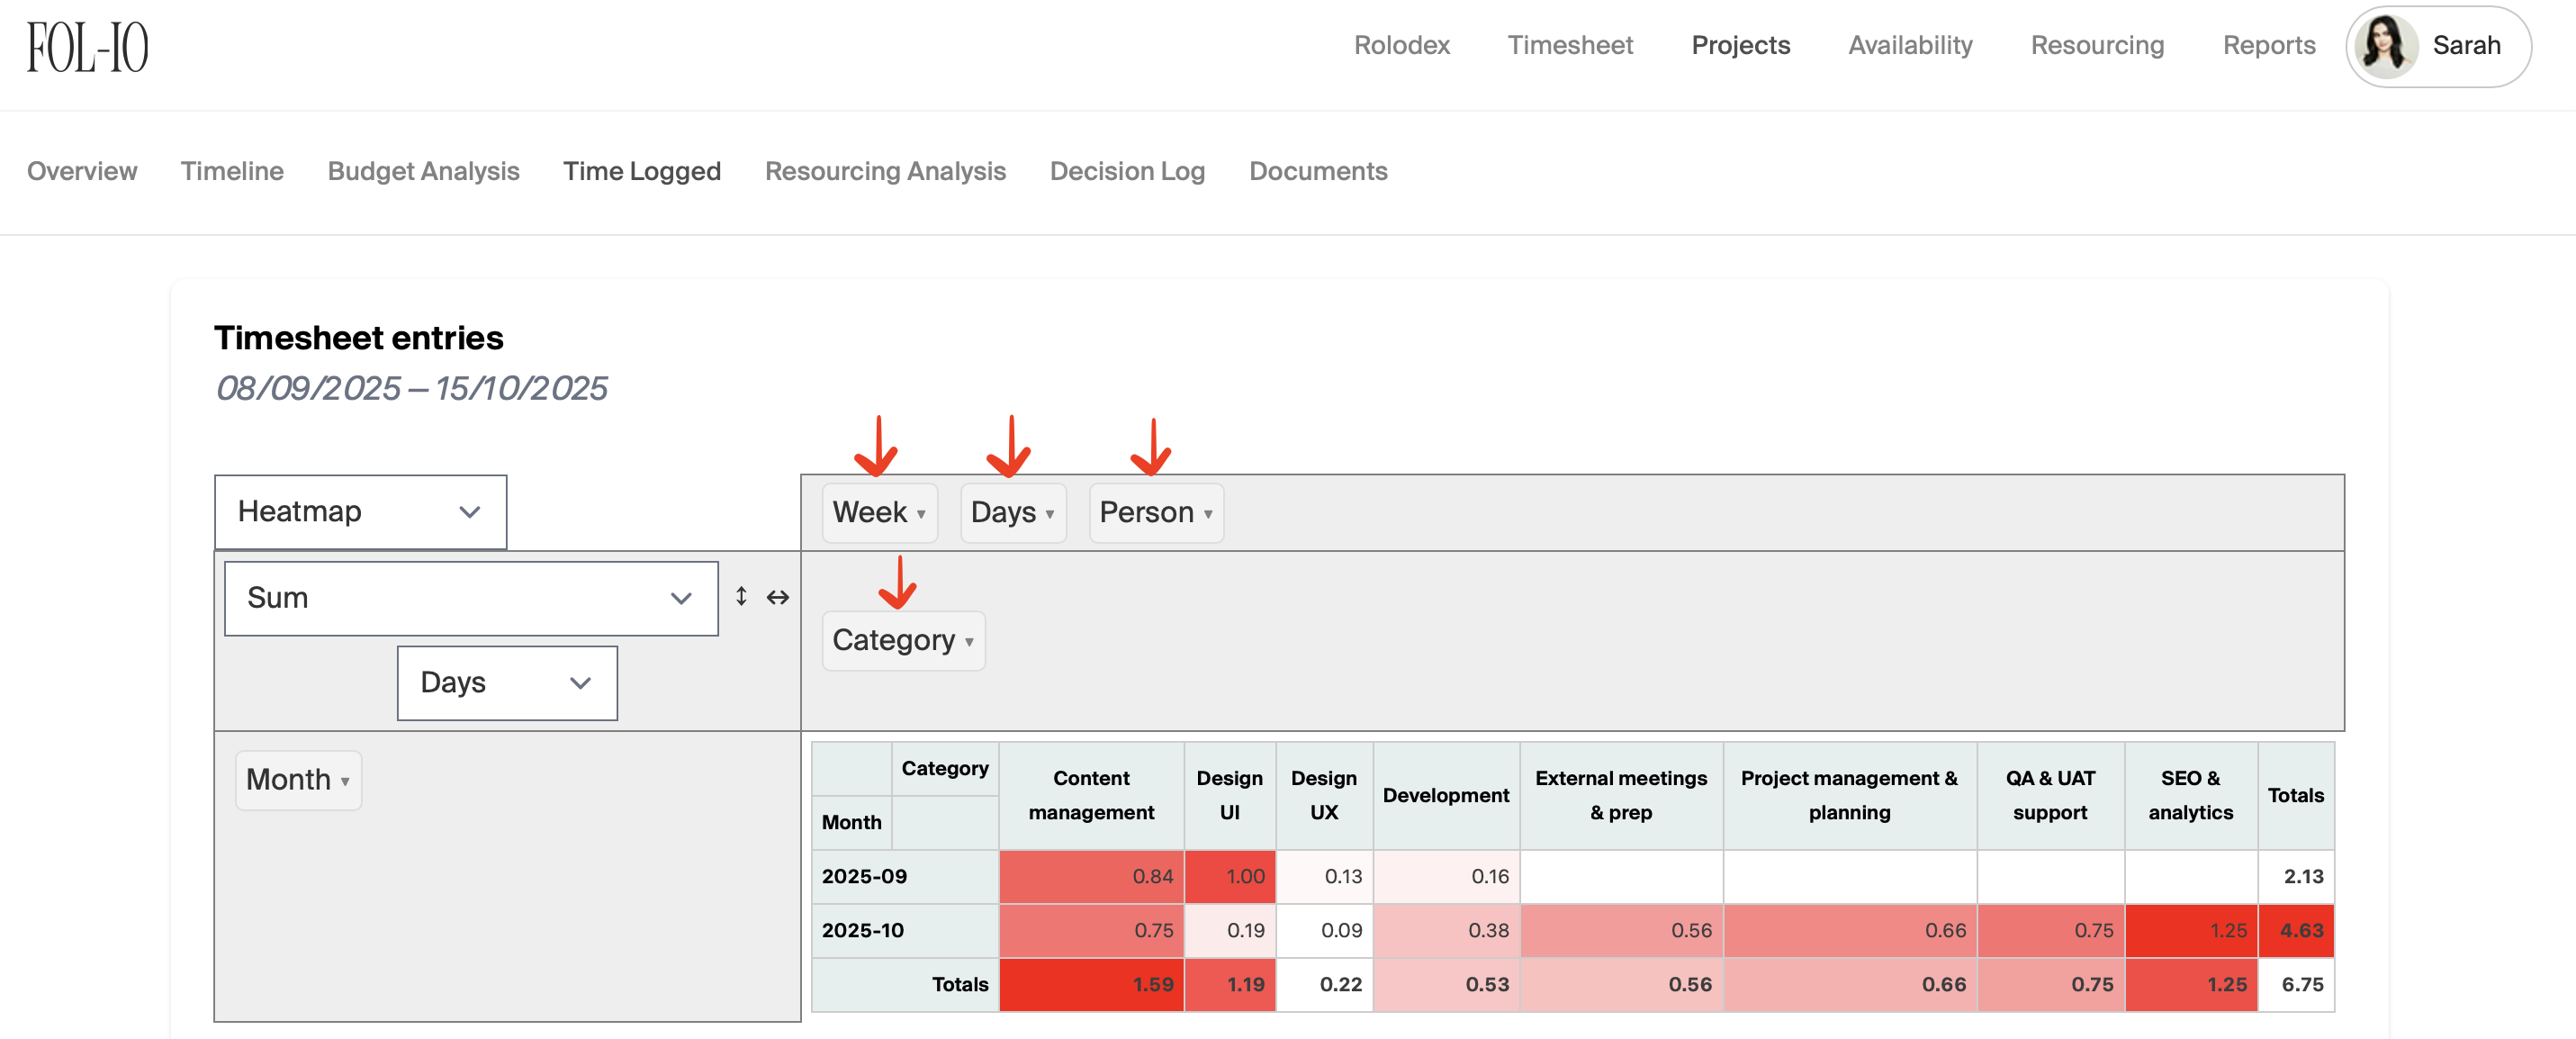
Time logged
Within the Time Logged section, this is where you will be able to get even more granular by customising the data to your specific needs. For example, you'll be able to select a certain user, over a specific period of time and in specific categories.